Canon Mg3500 Scanner Setup In A Hassle-Free Manner
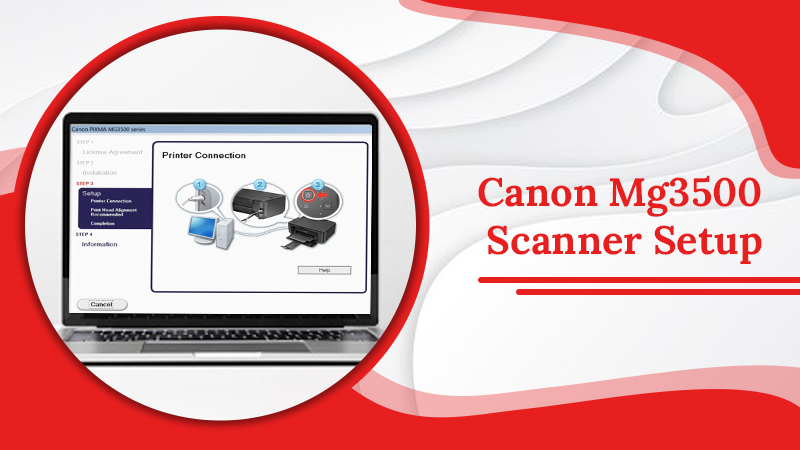
Whether you need to scan a single page or a hundred page books, Canon Mg3500 is the perfect scanner series. It is an all-in-one beneficial printer device having included with scanning functions as well. Therefore, users use such a device won’t only print the document but also can scan, or fax anything. However, before start print job or scanning photos or images, it is necessary to do Canon Mg3500 Scanner Setup. If you are a newbie and don’t know how to set it up correctly, don’t feel helpless. This post will teach you to unbox this printer cum scanner and connect it with a Wi-Fi network. In a correct way you can set up and let the printer to print.
For What Purpose Canon Mg3500 Scanner Is Being Used?
The Canon Mg3500 Scanner is compatible with all operating devices. So, no matter you have Windows or Mac OS; you can use it to scan your important files and documents. Furthermore, you can also connect it with your smartphone in terms of scanning your file directly from your mobile phone. For this, you are only required to download the app named PIXMA printer from iTunes or Google Play Store. Don’t worry! It is so simple and easy to use.
Step By Step Guide For Canon Mg3500 Scanner Setup
Here is the quick and instructive method of Canon Mg3500 Scanner Setup. So, stop wandering for any guidelines, just stick your eyes in the below noted points:
Step 1: Unbox The Canon Mg3500 Scanner
In the very beginning step, you need to unbox your printer appropriately. First, you have to check and ensure that the scanner box contains all the necessary equipments. Here’s the list of the parts you should check after unboxing the scanner. Take a brief look at once:
- First and foremost, check for the Power cord and USB cable.
- Second, search for the set up guide book and the installation CD. Store the CD at the safest place otherwise you can find difficulties in downloading the printer and scanner driver.
- When you lost the CD, you have to visit the official website of Canon for Canon Mg3500 Install driver.
- Ink cartridge. PG-240 Black Cartridge and CL-241 color cartridge.
Once you are confirmed about all these above assessments, you can now move to the next guideline. This will let you to begin setting up process.
Step 2: Connect The Canon MG3500 Scanner
Here are the comprehensive guidelines that will assist you to set up and download your Canon Mg3500 Install printer driver. Thus, without wasting your single minute, let’s connect your printer wirelessly and set it up correctly. Here’s how:
- First, take the power cable in your hand.
- Now, plug the one end of the cable into the printer and another end with the wall outlet.
- Now, switch on the power and press the Power button of the scanner.
- Now, place the ink cartridges precisely in their place.
- Push down the black throw in the first right on the right-hand side.
- Now, turn on your device and select your preferred language.
- Thereafter, press the “OK” button and turn off the device.
Step 3: Install The Canon MG3500 Printer Driver
Once the device has been successfully connected, let’s download the latest printer driver on your PC. Here’s what you should perform:
- First, take out the installation CD from the packet.
- Now, insert the CD into the CD drive on your computer.
- Put a right-click on the icon of the CD.
- Afterward, you have to accept the User Agreement.
- Now, finally click the “Yes” button.
Step 4: Install The Ink Cartridges
Follow the following guidelines in order to install the ink cartridges in your printer tray:
- First, lift-up the scanner lid and place the carriage holder in its original place.
- After appropriately inserting the ink cartridges one by one, close the lid.
- Now, turn on the unit and press the Set button.
- Afterward, select the “Wi-Fi Settings” from the Control Panel.
- Then, click the “OK” tab.
Step 5: Use The WEP Key
Here’s what you need to perform:
- First, choose the Easy Setup which appears on the scanner screen.
- After making selection, press the OK button.
- Enter the password to connect the WEP key and then hit OK.
- Once it is connected, click the OK tab.
- After that, choose the country and hit “Next”.
- Now, choose the Easy Install option and press the “Next” button.
Step 6: Choose The Default Printer
To start printing or scanning, you need to set your printer as a default printer. Here’s how:
- First, select the “Use the Printer” option on the network.
- Then, click “Next”.
- After doing so, a box will appear on the system screen which says Printer Detection.
- And then, hit the “Click” option.
After completing the aforementioned guide, the Canon Mg3500 Scanner has been successfully setup, for sure.
Consult Our Deft Connoisseurs For Additional Help
If you are yet unable to get the Canon Mg3500 Scanner Setup, don’t freak out! We have tech specialists active round the clock for your better and instant support. So, feel free to call us at the 24/7 helpline number and stay united with us unless you got your answer. We offer the best and effective information to all the needy customers. So, in a limited time period, you can set up your printer.
